Search Docs by Keyword
Mounting Storage on Desktop or Laptop
Some resources can be mounted to your local computer via Samba (aka SMB or CIFS), mainly home directories. But there are a few other shares where this has been deemed necessary and implemented on a share-by-share basis.
Please note that most, file systems, including lab directories on holylabs, cannot be mounted on your desktop.
- Scratch – Scratch space (/n/netscratch) cannot be mounted in this manner. It is only available on the cluster. If you need to transfer data to/from scratch, you can use an SFTP or SCP client to connect to the cluster and then change to /n/netscratch/[your lab’s space] . You can also use Globus for large external transfers.
- Active Lab Storage (Tier 0) and shares whose name begin with holy generally cannot be mounted. If you need to transfer data to/from such shares, you can use an SFTP or SCP client to connect to the cluster and then change to the path of your lab share. You can also use Globus for large external transfers.
- Active Lab Storage (Tier 1) and (Tier 2) shares can be exported via Samba if a valid need exists. Otherwise, if you need to transfer data to/from such shares, you can use an SFTP or SCP client to connect to the cluster and then change to the path of your lab share . You can also use Globus for large external transfers.
- Long-term storage (tape) cannot be mounted and is only accessible via Globus.
Connect to the VPN
Cluster storage must be routed through a VPN connection. If you don’t already have one setup, follow the VPN setup instructions.
NOTE: If you have set up custom DNS on your computer, this may cause issues connecting to shares.
Find the filesystem path (if not known)
If you already know the path, skip to instructions for your operating system below.
Mounting your HOME DIRECTORY
If you have cluster access, you can mount your home directory as a drive. You can figure out the path to your home directory by using ssh to login to the cluster. Use cd ~ to go to your home directory (on a Unix-like system, the ~ character is a shortcut to ‘my home directory’). Then type pwd to show where your home directory resides. [jharvard@boslogin02 ~]$ cd ~ [jharvard@boslogin02 ~]$ pwd /n/home08/jharvard The home08 is the part we need in this example in order to construct the full path to your home directory. Since all home directories are mounted from the same server, we don’t need to figure that part out. The path, therefore, that you will need for connecting is the combination of the server name, rcstore.rc.fas.harvard.edu. followed by the word homes to signify that it’s a home directory, the sub-folder your home directory resides in (home08 in this example), and your RC username.
For this example, this would result in:
For Windows \\rcstore.rc.fas.harvard.edu\homes\home08\jharvardFor Mac OSX
smb://rcstore.rc.fas.harvard.edu/homes/home08/jharvard
Mounting a LAB SHARE
First, it’s important to note that most lab shares are not mountable. Also, cluster-only filesystems such as scratch (netscratch, holyXXXX, or local scratch) are never mountable. If you need to transfer data to/from such shares, you can use an SFTP or SCP/Rsync, or use Globus for large external transfers.
If you don’t already know the path to your lab’s share and believe it should be mountable, asking a lab-mate or your PI for the path is the quickest option. If your lab-mates do not know and you believe your share is mountable, please contact FASRC.
You can also try and see if your lab’s share is mounted on our Samba cluster using the instructions further down the page, but with one of the following paths:
For Windows \\smbip.rc.fas.harvard.edu\ (browse for your lab’s name, see below)
For Mac OSX smb://rcstore.rc.fas.harvard.edu/ (browse for your lab’s name, see below)
If found, you can use the path shown there to mount your lab’s share.
Operating System-Specific Instructions
Macs use Connect to Server
If you’re using a Mac, go to a Finder window (or click on the desktop) and choose Go > Connect to Server from the menu. 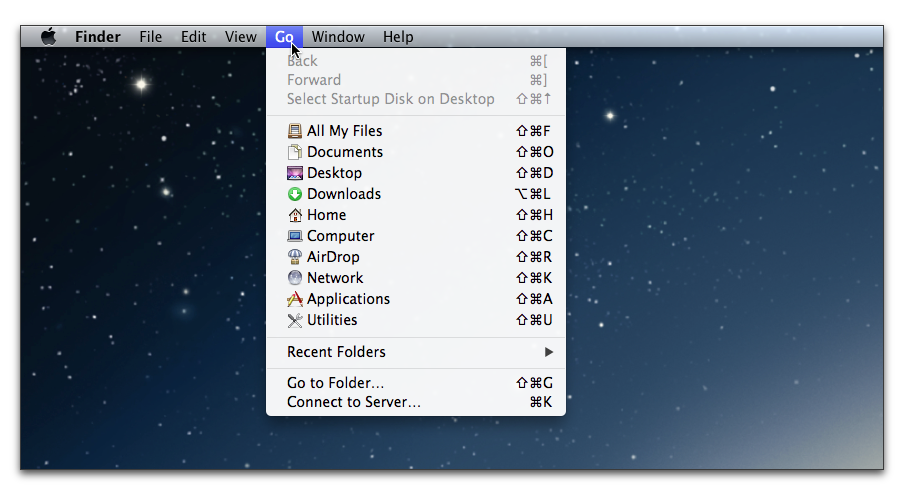 In the server address box, enter the server and path combination as described above prepended with the
 smb:// protocol specifier (please note that Macs use “/” where Windows uses of “\”). Using the example information above, the value might be smb://rcstore.rc.fas.harvard.edu/homes/home08/jharvard to mount the home directory of user jharvard. If you are mounting a lab share path, enter that instead (example: smb://smbip.rc.fas.harvard.edu/jharvard_lab). 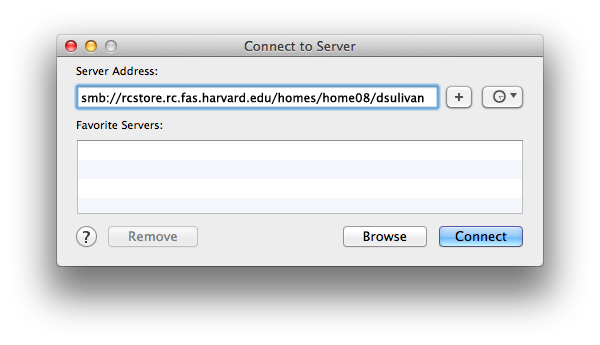 If you’ve selected the proper volume, you should get a login prompt. Use your FASRC credentials here. Note that you must include the
 rc\ domain specifier at the beginning of your user name. 
PCs use Map Network Drive
You can connect to shared storage on a Windows PC by using the Map Network Drive button in a file explorer window (click the yellow folder icon in the taskbar).
Select This PC in the left-hand pane. 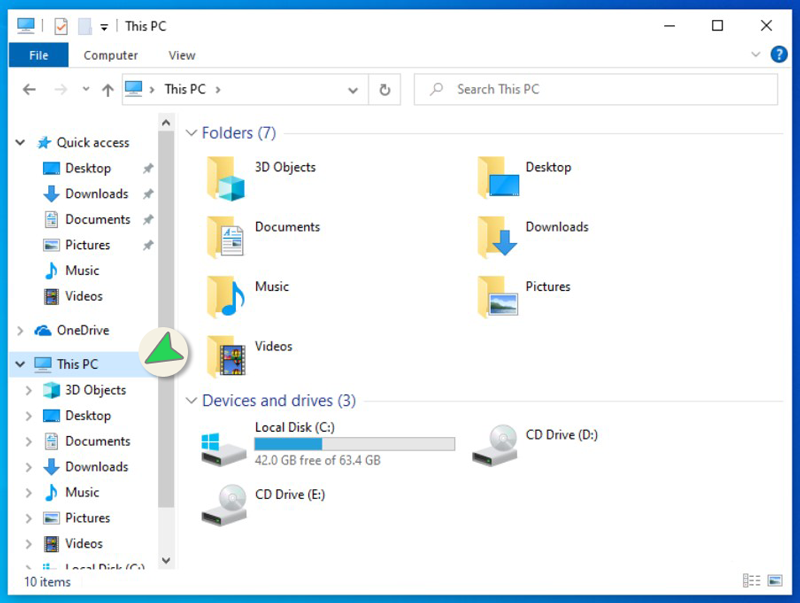
Click Computer, which will present a drop-down menu, and then from that menu click Map network drive. 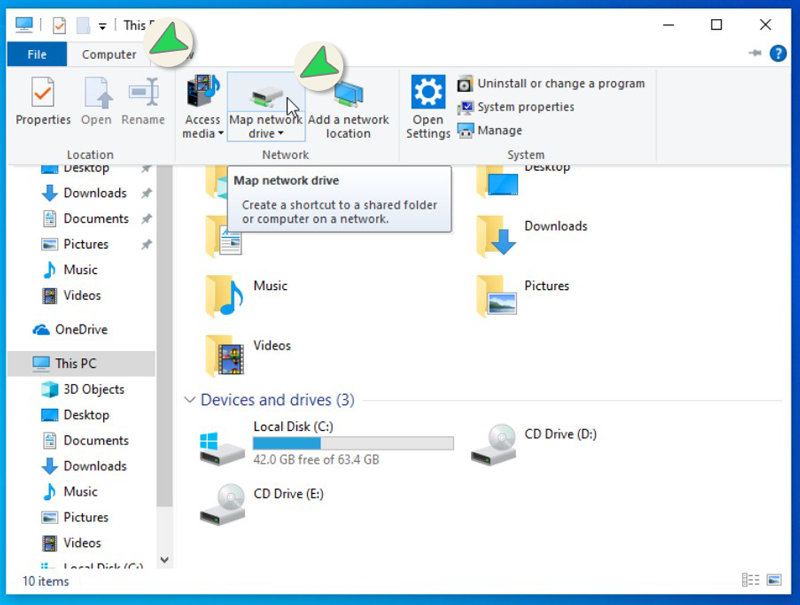
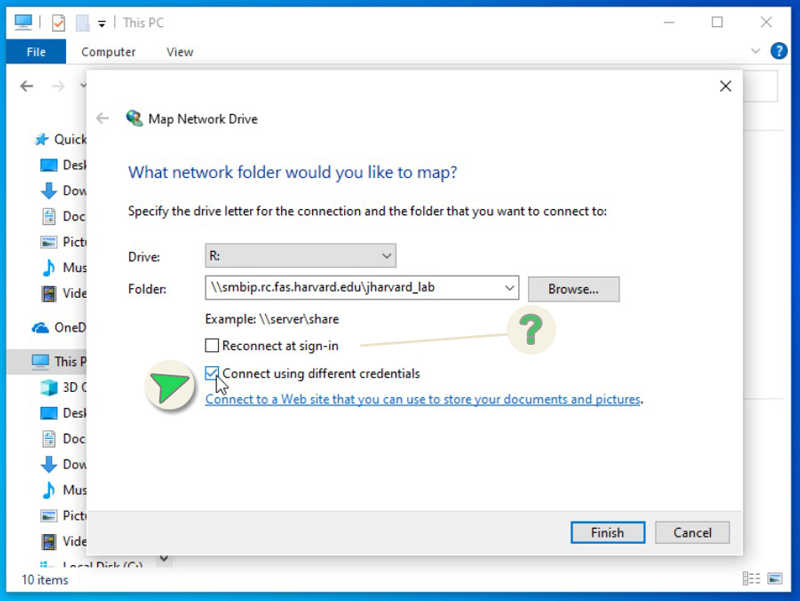
In the Map Network Drive utility, select a free Drive letter.
Then enter the combination of fileserver address and path in the Folder field.
For the example, in the home directory described above the path would be \\rcstore.rc.fas.harvard.edu\homes\home08\jharvard.
If you are mounting a lab share path, enter that instead (example: \\smbip.rc.fas.harvard.edu\jharvard_lab).
Make sure Connect using different credentials is checked.
Click Finish to continue.Optional: If you want this drive to reconnect every time you log on to your computer, check Reconnect at sign-in. Just bear in mind that it will not re-connect if you are not on the VPN or your normal campus wired jack.
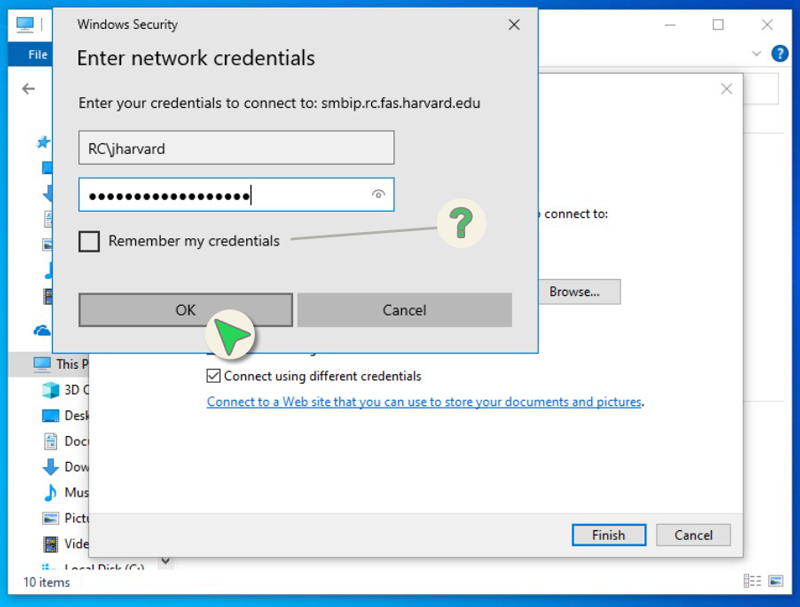
The reason you must check Connect using different credentials in the Map Network Drive box is that your PC has a local account (and a local ‘domain’) and it will default to that if you do not specify another username and domain. If you don’t select this checkbox and attempt to connect, it will try to authenticate with your local PC information and after three failed attempts will result in a lockout (FYI: Don’t worry, lockouts expire automatically in about 5 minutes).
When you are prompted to Enter Network Credentials, prepend your FASRC username withRC\ to specify you are connecting to the RC domain with your username.
Example: RC\jharvard means ‘Connect to the server and path I entered above as RC domain user jharvard’.
This will prompt you for your password. If instead you get an error message about a read-only filesystem, it could be because mount.cifs is not installed on your system. Using this method, you will need to reissue the command every time you boot your computer.Some users prefer using smbclient to connect to Samba/SMB/CIFS shares. This is an optional package you will need to install on your own.
SFTP/Filezilla
If you are unable to mount your lab storage using one of the above methods, or your lab’s share is simply not available via Samba, you always have the option of using SFTP. This is especially useful if you need to maintain a different VPN connection and cannot connect to our VPN. SFTP to a login node does not require a FASRC/FAS VPN connection as login nodes use two-factor authentication.
We recommend FileZilla as a reliable, cross-platform SFTP client. Note that SFTP uses SSH and our two-factor authentication, so you will need to ensure you have OpenAuth set up, and that you have have cluster access and a home directory. If you are unsure, SSH to a login node first. If you need to request cluster access, see our doc on adding groups/access.