Search Docs by Keyword
SFTP file transfer using Filezilla (Mac/Windows/Linux)
Filezilla is a free and open source SFTP client which is built on modern standards. It is available cross-platform (Mac, Windows and Linux) and is actively maintained. As such Research Computing is recommending its use over previous clients, especially as it does not have some of the quirks of clients like Cyberduck or SecureFX. This document will outline setting up a bookmark in Filezilla to connect to the cluster or other RC file resources you have access to. NOTE: If your SFTP session constantly disconnects after several seconds, see this FAQ entry.
Download and Install
First you will need to download and install the Filezilla client You can download the latest version from Filezilla-project.org NOTE: Please download from this page and not the big green button so as to avoid bundled adware. Linux users may be able to install Filezilla using their respective package manager.
IMPORTANT: If you have never logged into the cluster before, please insure you’ve gone through the setup process and set up your OpenAuth token before proceeding.
STEP 1
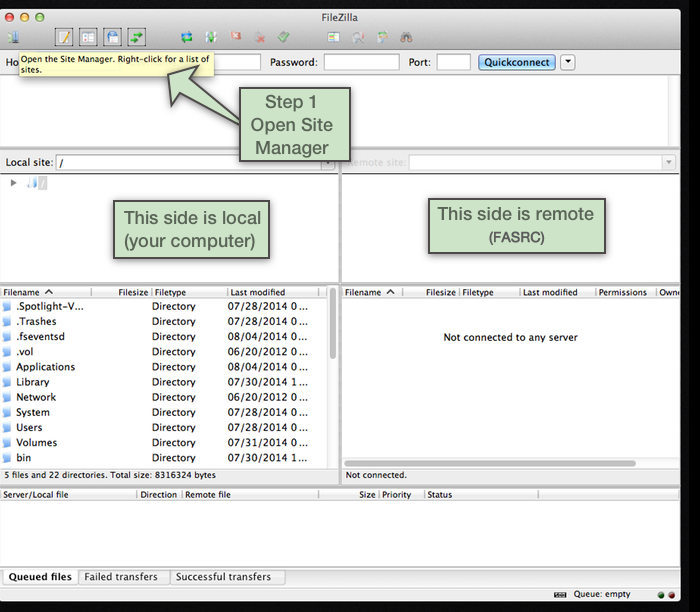
Once installed, launch Filezilla and click the Site Manager icon in the upper left to begin setting up a connection bookmark for future use.
STEP 2
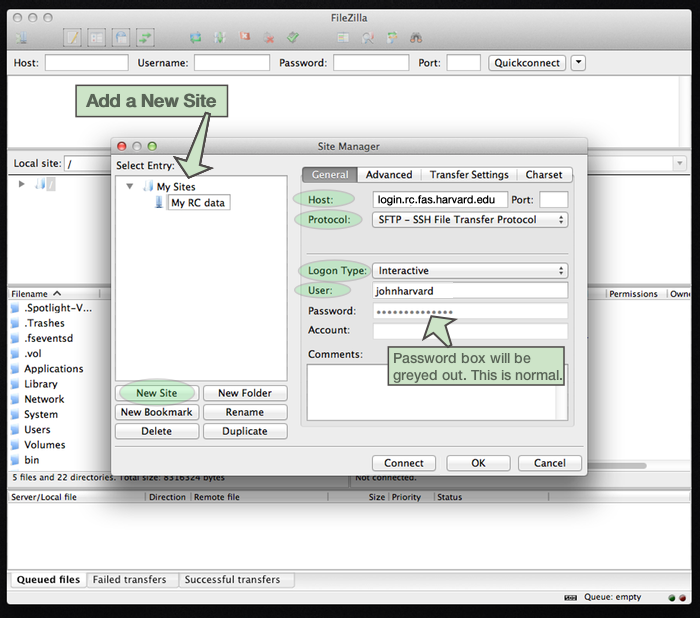
Click New Site to add a new bookmark. Enter the connection details in the General tab.
- Host:
- If you are connecting to Cannon, enter login.rc.fas.harvard.edu
- If you are connecting to FASSE, enter fasselogin.rc.fas.harvard.edu
- Protocol: select SFTP – SSH File Transfer Protocol
- Login Type: select Interactive (this is crucial, otherwise you will not be prompted for your OpenAuth token)
- User: enter your RC account username
- In newer versions of Filezilla, the password box will not exist, and in older versions of Filezilla it will be greyed out because we’re using Interactive login, which will instead prompt you for a password when you click Connect
- Now click the Transfer tab
STEP 3
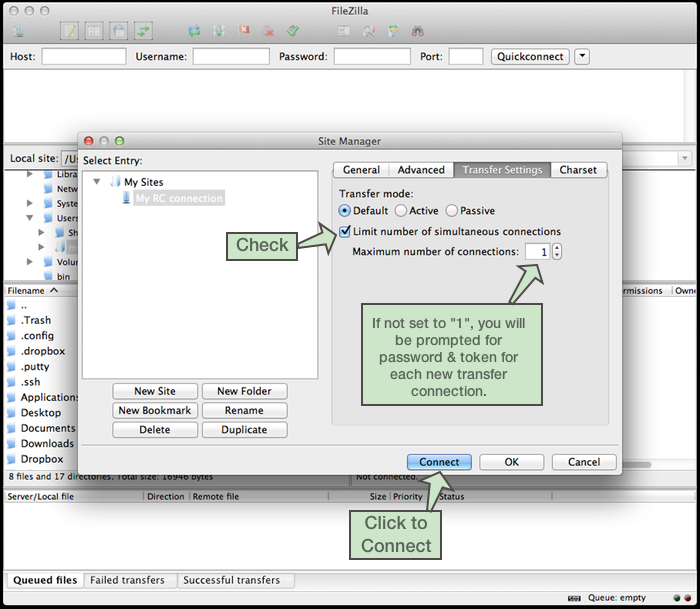
IMPORTANT Click the Transfer tab and check the Limit number of simultaneous connections box and set Maximum number of connections to “1”. Otherwise you will be prompted for your password and token each time the token expires and for every new simultaneous connection during file transfers.
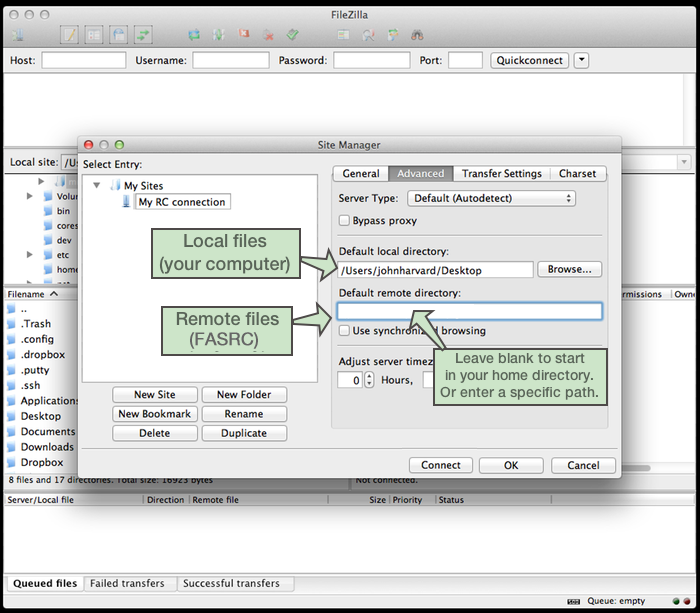
OPTIONAL In the Advanced tab, select the local (i.e. – on your computer) directory/folder you’d like to start in when connecting. You can type this in or click the Browse button and find the directory you want. You can leave Default remote directory: blank if you simply wish to connect to your RC account’s home directory. Or, if you wish to connect to a specific directory (for instance, your lab’s shared storage or a particular folder in your home directory), you can enter this here.
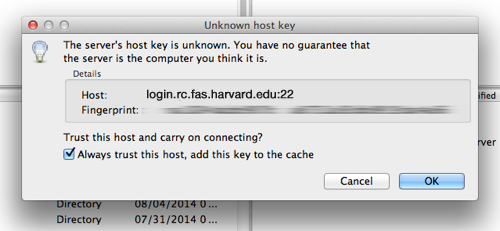
Click Connect to initiate a connection. If you’re just making a bookmark for later, click OK. The first time you connect you will see a window titled “Unknown host key”. Check the “Always trust this host, add this key to the cache” box and click OK. This will store cluster key for future use.
STEP 4
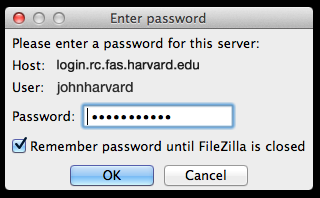
A password prompt box will pop up. Enter your RC account password here.
- Check “Remember password until FileZilla is closed”, otherwise it will prompt you periodically and interrupt transfers
- Click OK
STEP 5
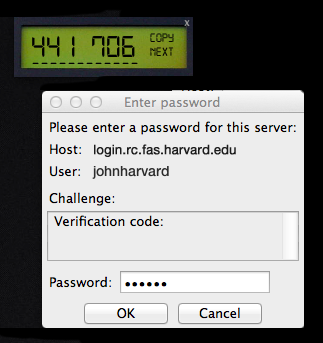
Another password box will pop up as. This is for your OpenAuth token. Enter the code shown in your OpenAuth token window (Or Google Authenticator or DUO Mobile, if you are using one of alternative token generators) and click OK.
STEP 6
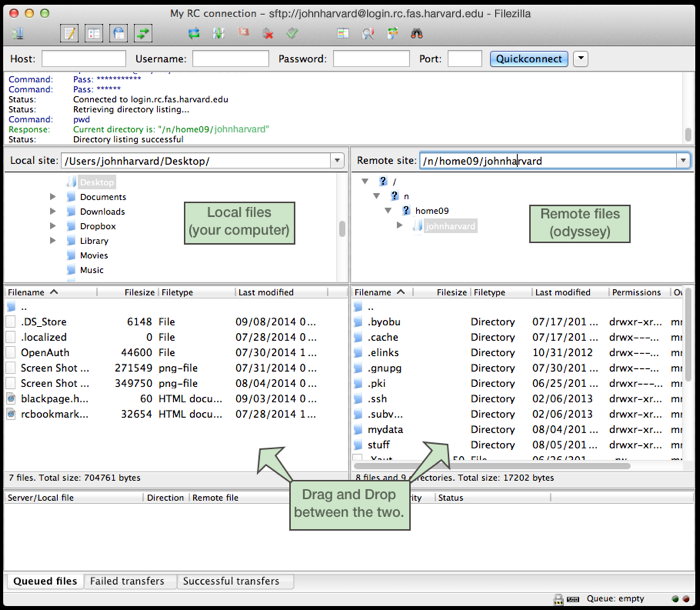
You should now be connected to the cluster and see your local files in the left-hand pane and the remote files in the right-hand pane. You can drag and drop between them or drag and drop to/from file windows on your computer. When done, click the red X icon up top to disconnect.
ADVANCED TOPIC: Filename filtering rules in Filezilla
