Search Docs by Keyword
VSCode Remote Development via SSH or Tunnel
This document provides the necessary steps needed to setup a remote connection between your local VS Code and the Cannon cluster using two approaches: SSH and Tunnel. These options could be used to carry out the remote development work on the cluster using VS Code with seamless integration of your local environment and cluster resources.
Important:
We encourage all our users to utilize the Open On Demand (OOD) web interface of the cluster to launch VS Code when remote development work is not required. The instructions to launch VS Code using the Remote Desktop App are given here.
Prerequisites
- Recent version of VS Code installed for your local machine.
- Remote Explorer and Remote SSH extensions installed, if not already present by default
Approach I: Remote – SSH
In order to connect remotely to the cluster using VS Code, you need to edit the SSH configuration file on your local machine.
- For Mac OS and Linux users, the file is located at
~/.ssh/config - For Windows users, the file is located at
C:\Users\<username>\.ssh\config. Here<username>refers to your local username on the machine.
There are two ways to get connected to the cluster remotely:
- Connect to the login node using VS Code.
Important: This connection must be used for writing &/or editing your code only. Please do not use this connection to run Jupyter notebook or any other script directly on the login node. - Connect to the compute node using VS Code.
Important: This connection can be used for running notebooks and scripts directly on the compute node. Avoid using this connection for writing &/or editing your code as this is a non-compute work, which can be carried out from the login node.
SSH configuration file
Login Node
Adding the following to your SSH configuration file will let you connect to the login node of the cluster only with the Single Sign-On option enabled. The name of the Host here is chosen to be cannon but you can name it to whatever you like, e.g., login or something else. In what follows, replace <username> with your FASRC username.
Host cannon
User <username>
HostName login.rc.fas.harvard.edu
ControlMaster auto
ControlPath ~/.ssh/%r@%h:%p
Compute Node
In order to connect to the compute node of the cluster directly, execute the following two steps on your local machine:
- Generate a pair of public and private SSH keys for your local machine, if you have not done so previously, and add the public key to the login node of the cluster:
In the~/.sshfolder of your local machine, see ifid_ed25519.pubis present. If not, then generate private and public keys using the command:ssh-keygen-t ed25519 -b 4096Then submit the public key to the cluster using the following command:
ssh-copy-id -i ~/.ssh/id_ed25519.pub <username>@login.rc.fas.harvard.eduThis will append your local public key to
~/.ssh/authorized_keysin your home directory ($HOME) on the cluster so that your local machine is recognized. - Add the following to your local
~/.ssh/configfile by replacing<username>with your FASRC username. Make sure that the portion for connecting to the login node from above is also present in your SSH configuration file. You can edit the name of theHostto whatever you like or keep it ascompute. There are two ProxyCommand examples shown here to demonstrate how theProxyCommandcan be used to launch a job on a compute node of the cluster with a desired configuration of resources through thesalloccommand. Uncommenting the first one will launch a job on thegpu_testpartition of the Cannon cluster whereas uncommenting the second one will launch it on thetestpartition.
Host compute
UserKnownHostsFile=/dev/null
ForwardAgent yes
StrictHostKeyChecking no
LogLevel ERROR
# substitute your username here
User <username>
RequestTTY yes
# Uncomment the command below to get a GPU node on the gpu_test partition. Comment out the 2nd ProxyCommand
#ProxyCommand ssh -q cannon "salloc --immediate=180 --job-name=vscode -p gpu_test --gres=gpu:1 --time=0-01:00 --mem=4GB --quiet /bin/bash -c 'echo $SLURM_JOBID > ~/vscode-job-id; nc \$SLURM_NODELIST 22'"
# Uncomment the command below to get a non-GPU node on the test partition. Comment out the 1st ProxyCommand
ProxyCommand ssh -q cannon "salloc --immediate=180 --job-name=vscode -p test --time=0-01:00 --mem=4GB --quiet /bin/bash -c 'echo $SLURM_JOBID > ~/vscode-job-id; nc \$SLURM_NODELIST 22'"

Once the necessary changes have been made to the SSH configuration file, open VS Code on your local machine and click on the Remote Explorer icon on the bottom left panel. You will see two options listed under SSH – cannon and compute (or whatever name you chose for the Host in your SSH configuration file).
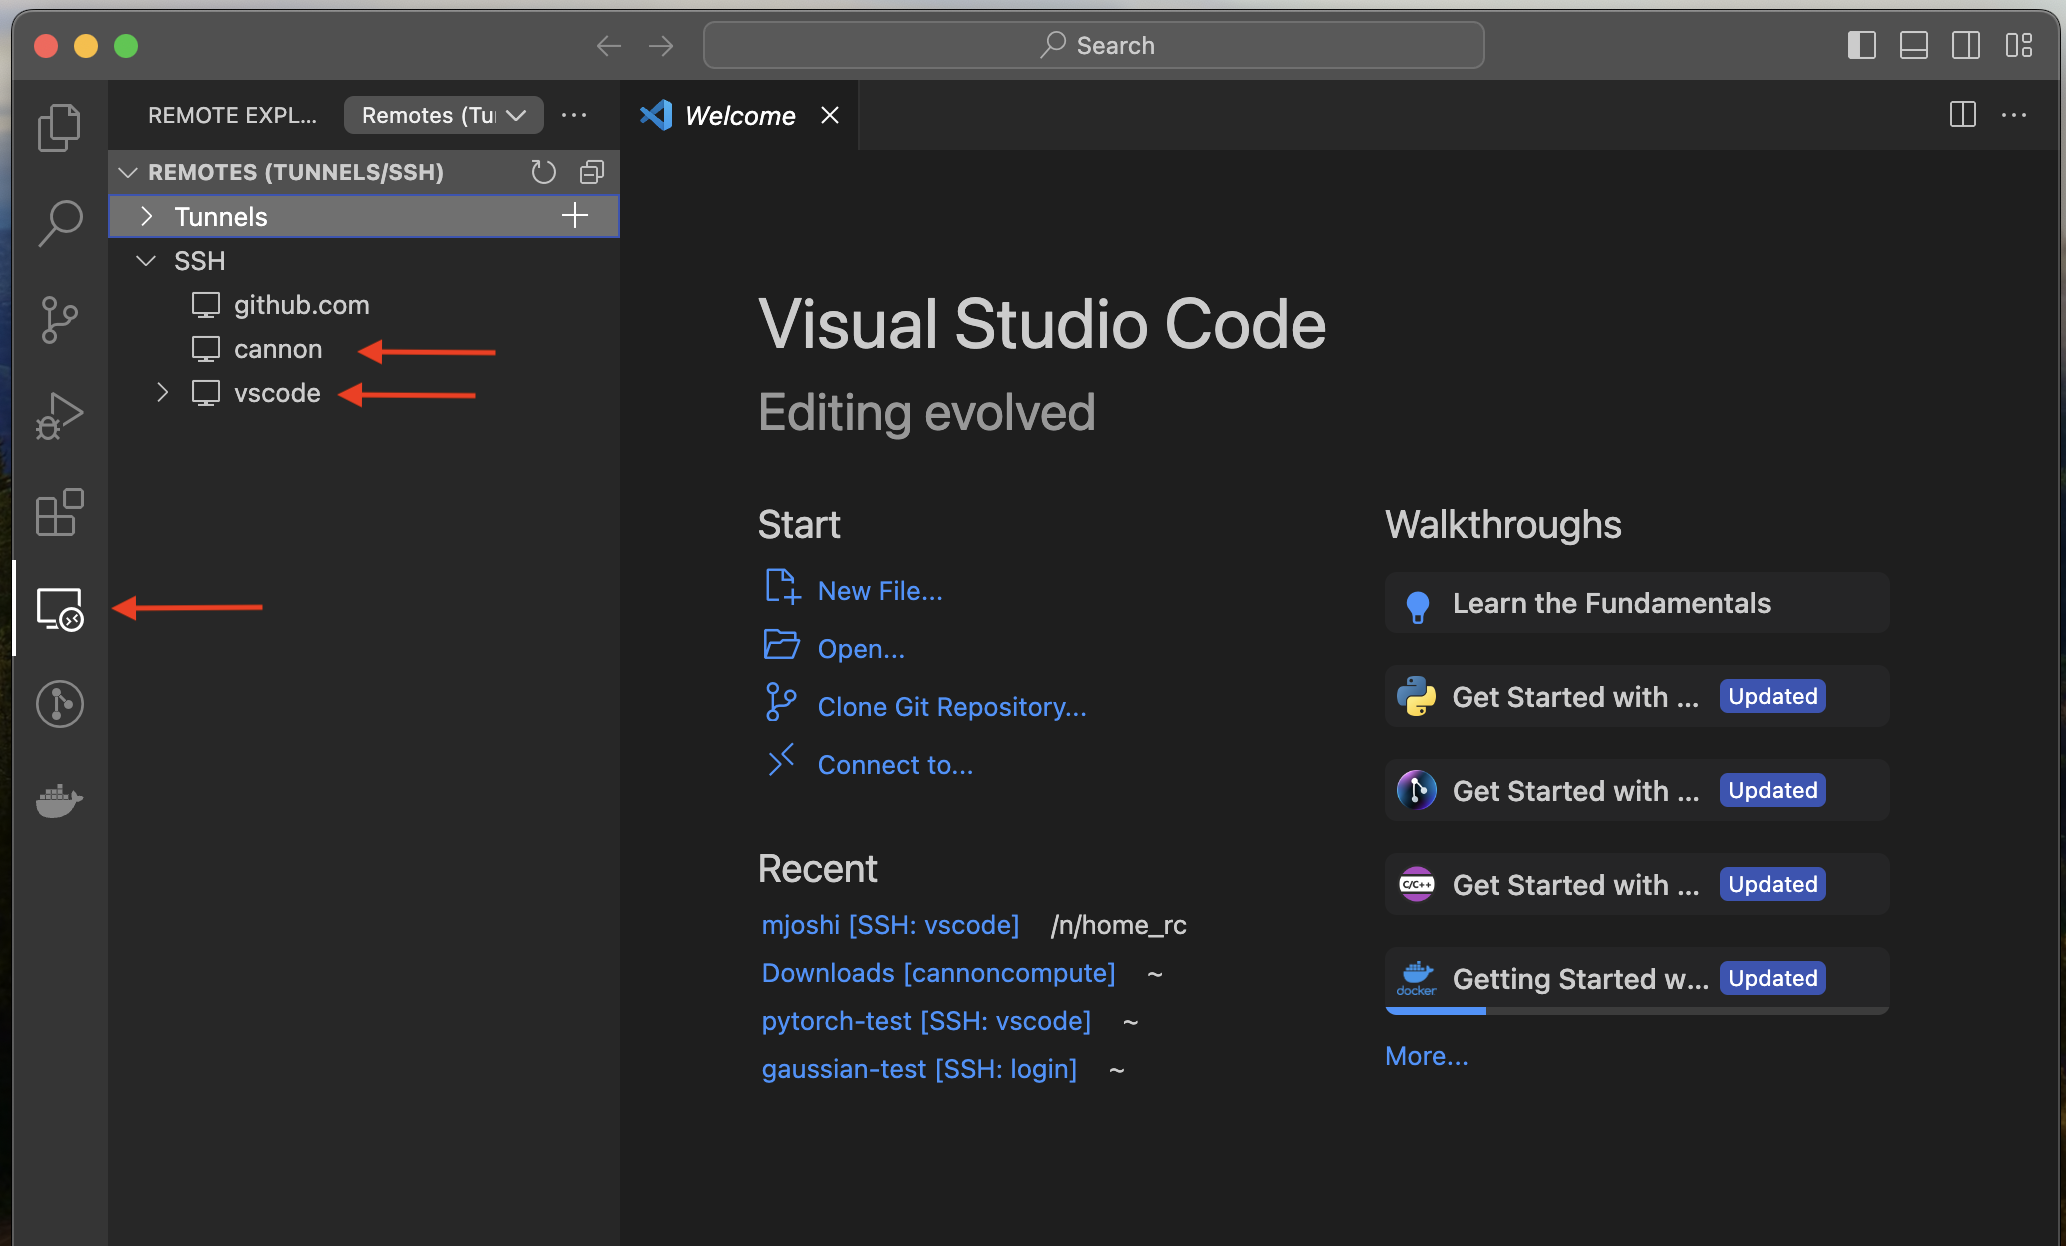
Connect using VS Code
Login Node
Click on the cannon option and select whether you would like to continue in the same window (indicated by ->) or open a new one (icon next to ->). Once selected, enter your 2FA credentials on the VS Code’s search bar when prompted. For the login node, a successful connection would look like the following.

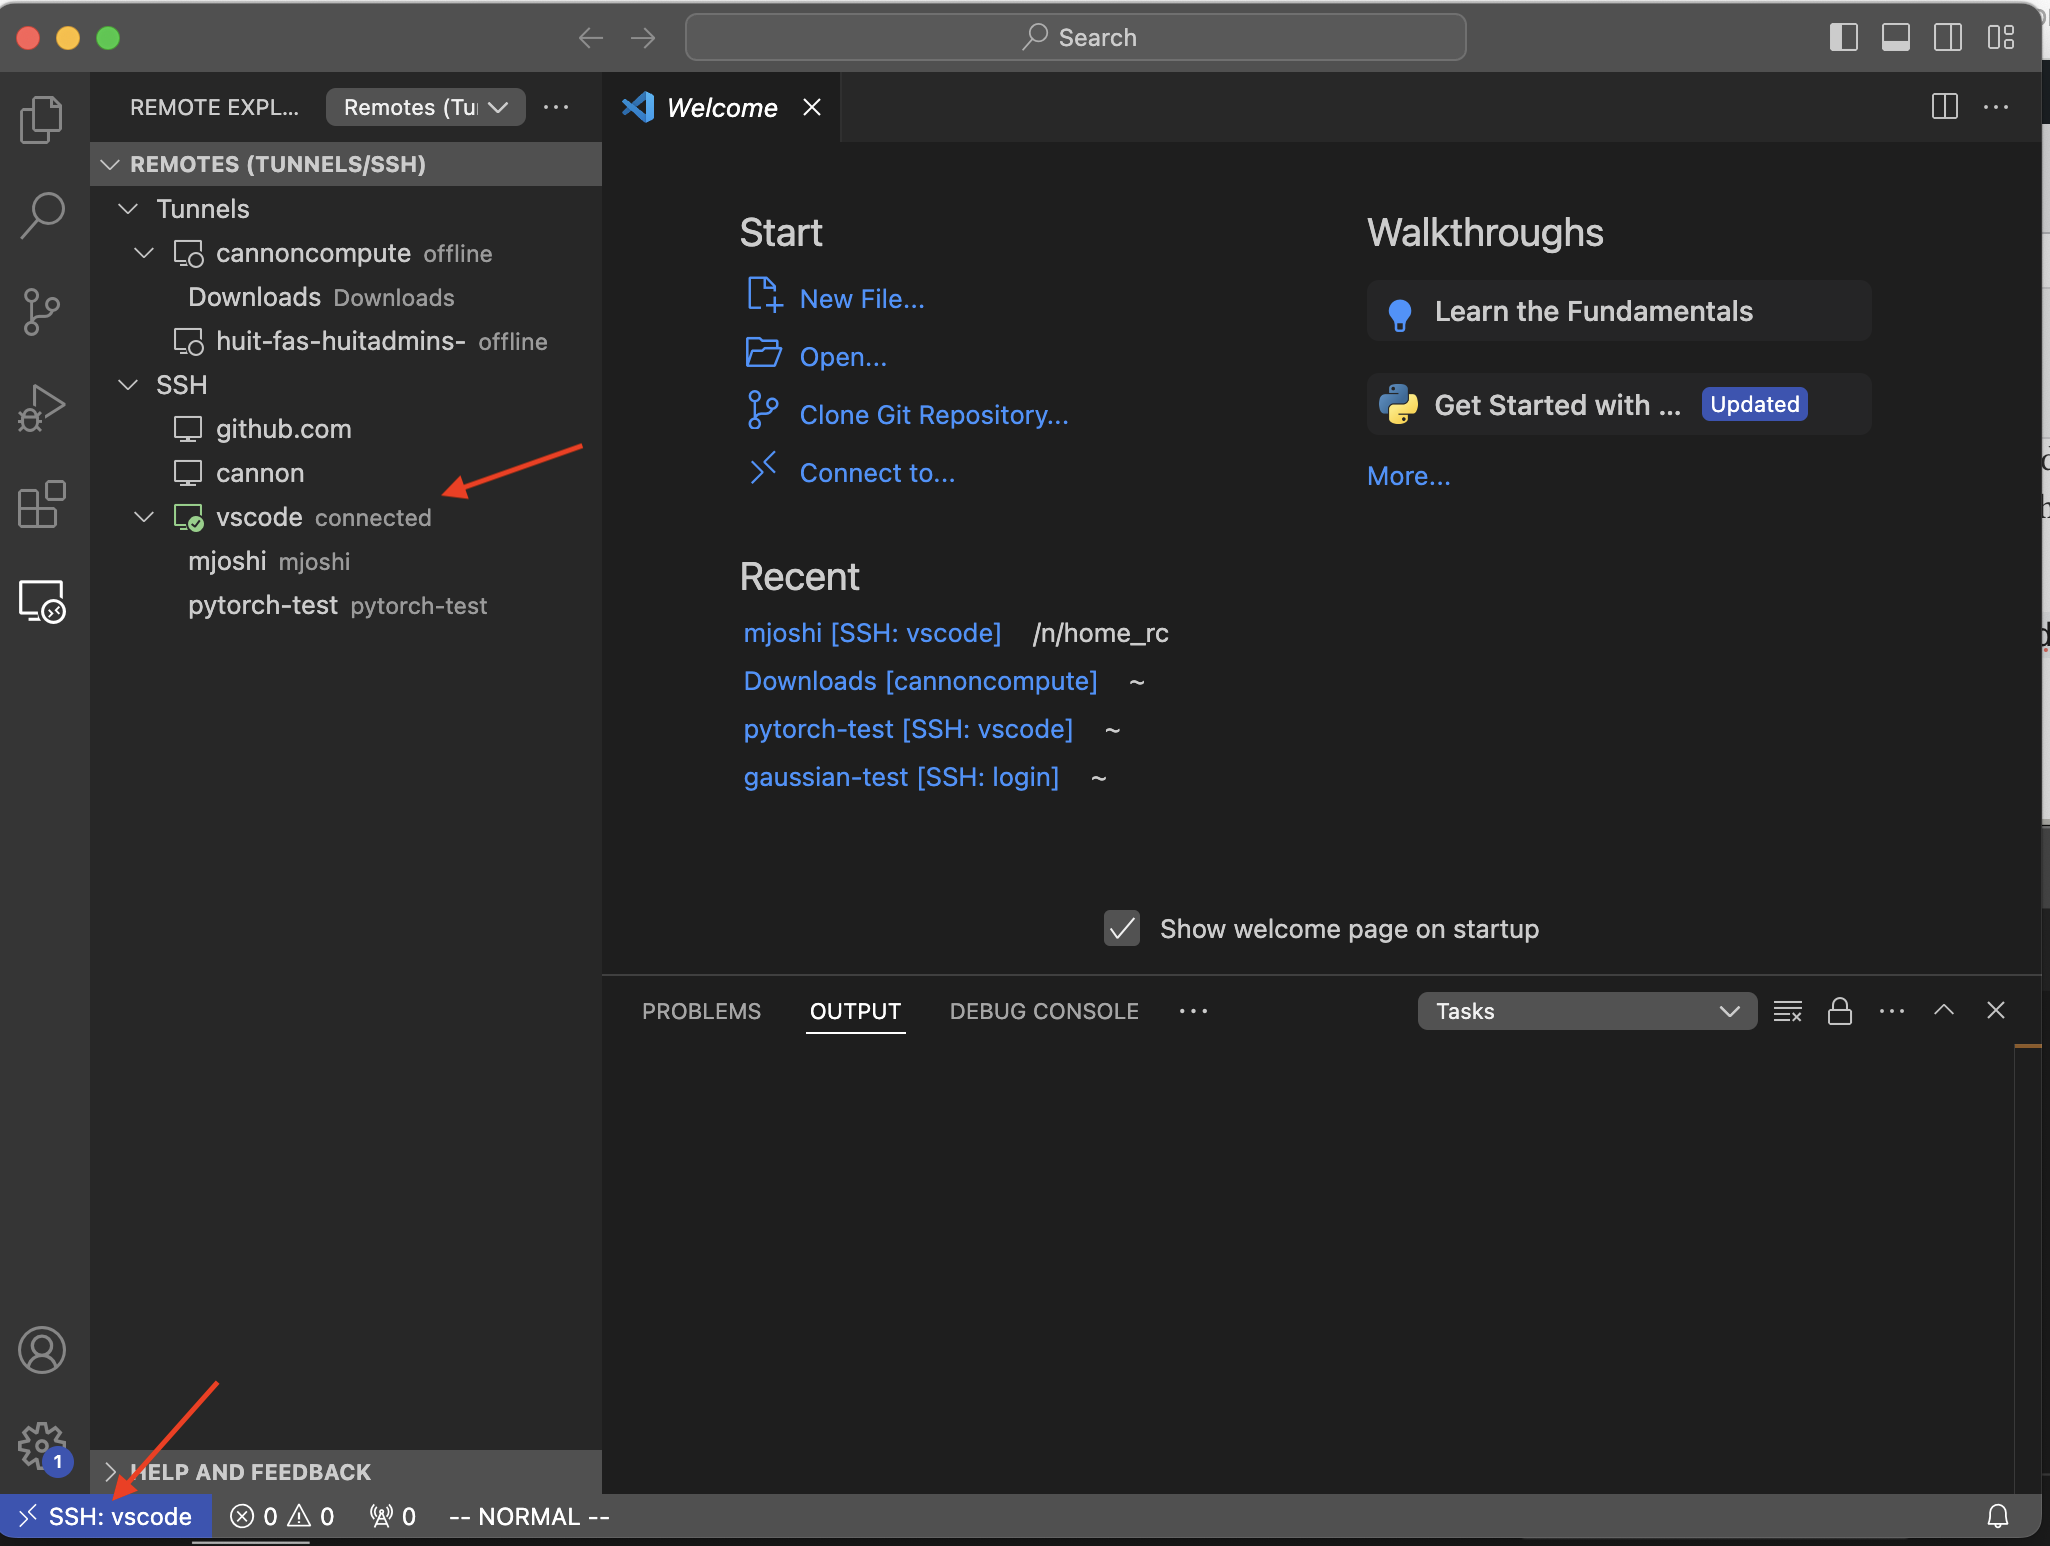
SSH:cannon.Compute Node
In order to establish a successful connection to Cannon’s compute node, we need to be mindful that VS Code requires two connections to open a remote window (see the section “Connecting to systems that dynamically assign machines per connection” in VS Code’s Remote Development Tips and Tricks). Hence, there are two ways to achieve that.
Option 1
First, open a connection to cannon in a new window on VS Code by entering your FASRC credentials and then open another connection to compute/vscode on VS Code either as a new window or continue in the current window. You will not have to enter your credentials again to get connected to the compute node since the master connection is already enabled through the cannon connection that you initiated earlier on VS Code.
Option 2
If you don’t want to open a new connection to cannon, then open a terminal on your local machine and type the following command, as mentioned in our Single Sign-on document, and enter your FASRC credentials to establish the master connection first.
ssh -CX -o ServerAliveInterval=30 -fN cannon
Then open VS Code and directly click on compute/vscode to get connected to the compute node. Once a successful connection is established, you should be able to run your notebook or any other script directly on the compute node using VS Code.
Note: If you have a stale SSH connection to
cannonrunning in the background, it could pose potential problems. The session could be killed in the following manner.$ ssh -O check cannon Master running (pid=#) $ ssh -O exit cannon Exit request sent. $ ssh -O check cannon Control socket connect(<path-to-connection>): No such file or directory
Approach II: Remote – Tunnel
In order to establish a remote tunnel between your local machine and that of the cluster, execute the following steps. Remember to replace <username> with your FASRC username.
-
ssh <username>@login.rc.fas.harvard.edu -
curl -Lk 'https://code.visualstudio.com/sha/download?build=stable&os=cli-alpine-x64' --output vscode_cli.tar.gz -
tar -xf vscode_cli.tar.gz - An executable,
code, will be generated in your current working directory. Either keep it in your$HOMEor move it to yourLABSfolder, e.g.mv code /n/holylabs/LABS/rc_admin/Everyone/
- Add the path to your
~/.bashrcso that the executable is always available to you regardless of the node you are on, e.g.,export PATH=/n/holylabs/LABS/rc_admin/Everyone:$PATH
- Save
~/.bashrc, and on the terminal prompt, execute the command:source ~/.bashrc - Go to a compute node, e.g.:
salloc -p gpu_test --gpus 1 --mem 10000 -t 0-01:00 - Execute the command:
code tunnel - Follow the instructions on the screen and log in using either your Github or Microsoft account, e.g.:
Github Account - To grant access to the server, open the URL https://github.com/login/device and copy-paste the code given on the screen
- Name the machine, e.g.:
cannoncompute - Open the link that appears in your local browser and follow the authentication process as mentioned in steps# 3 & 4 of https://code.visualstudio.com/docs/remote/tunnels#_using-the-code-cli
- Once the authentication is complete, you can either open the link that appears on the screen on your local browser and run VS Code from there or launch it locally as mentioned below.
- On the local VSCode, install Remote Tunnel extension
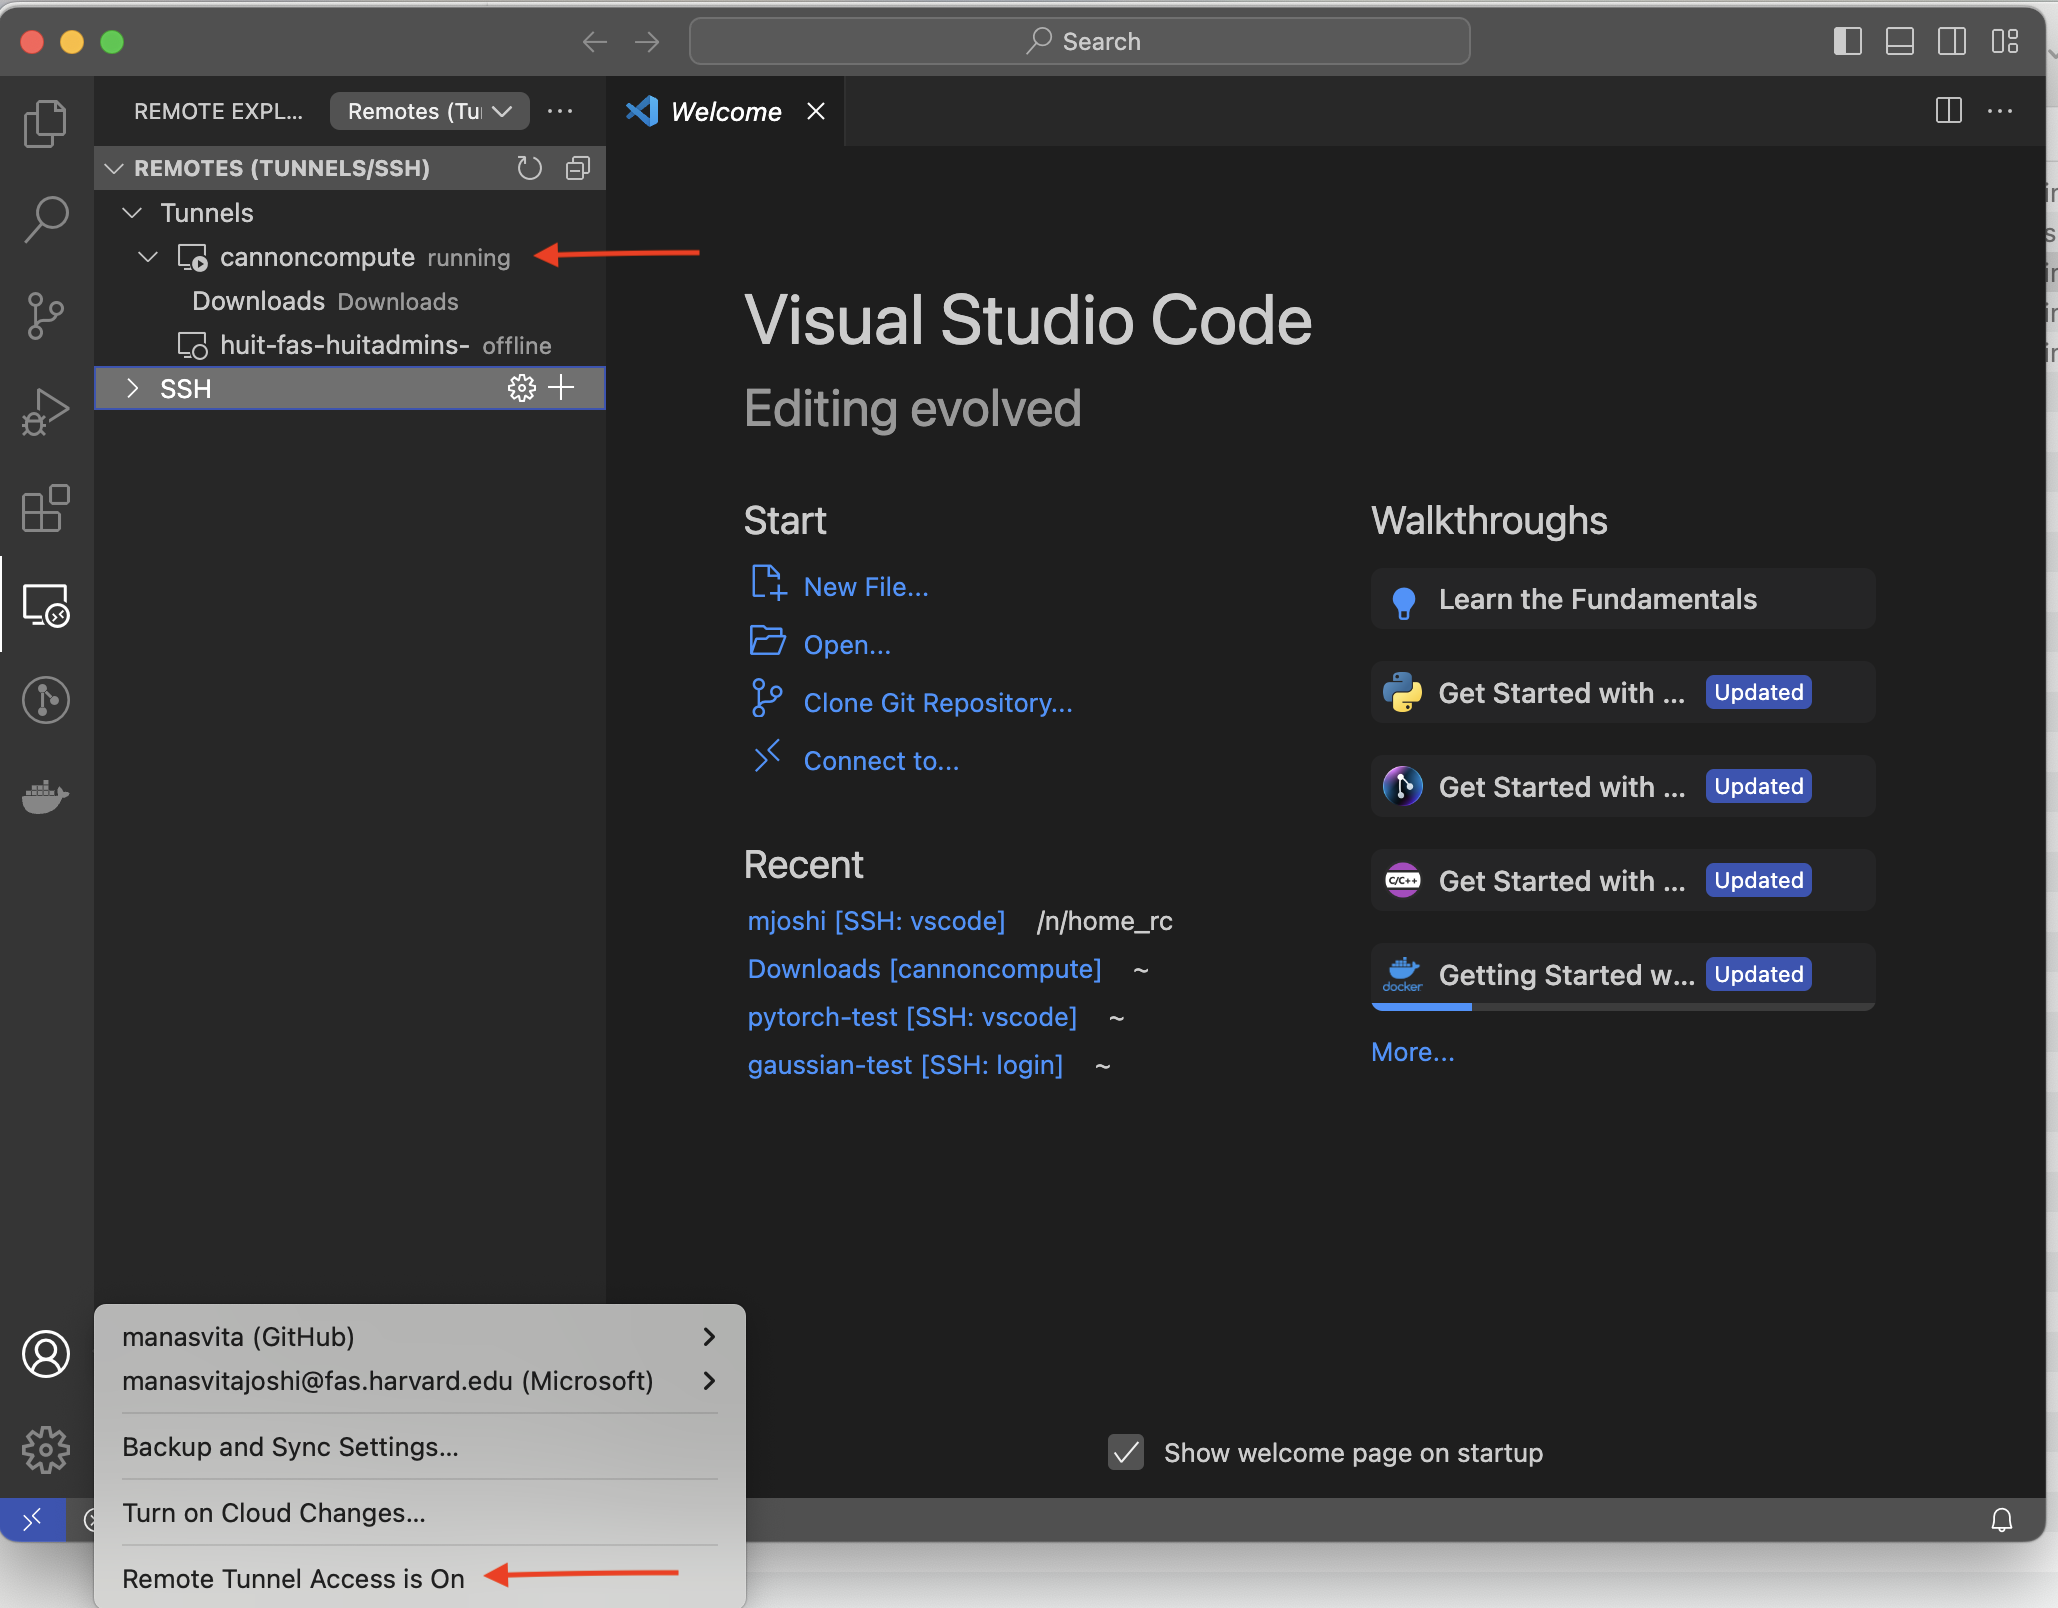
- Click on VS Code Account menu, choose “
Turn on Remote Tunnel Access” - Click on
cannoncomputeto get connected to the remote machine either in the same VS Code window (indicated by ->) or a new one (icon besides ->). Prior to clicking, make sure you see:
Remote -> Tunnels -> cannoncompute running
Note:
Every time you access a compute node, the executable,code, will be in your path. However, you will have to repeat step#10 before executing step#16 above in order to start a fresh tunnel.
Enjoy your work using your local VSCode on the compute node.